You can use our PCB library Wizard to quickly build IPC compliant schematic symbols and PCB footprints in your web browser. This tutorial will take you through the steps to creating your first part.
1. Visit www.componentsearchengine.com
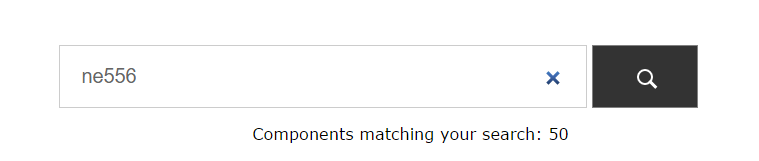
2. Enter part or all of the part number of the part that you require.
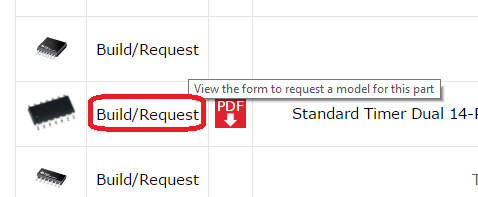
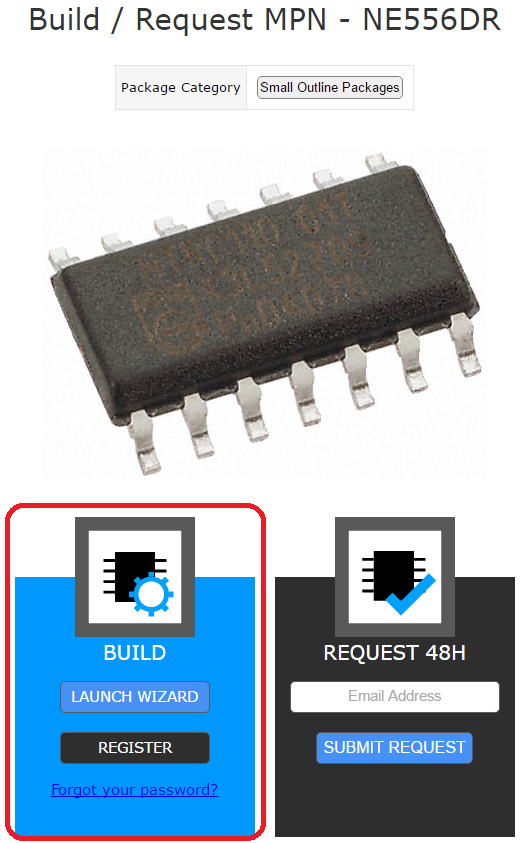
3. Click on the Build/Request request link (if the download icon is missing)
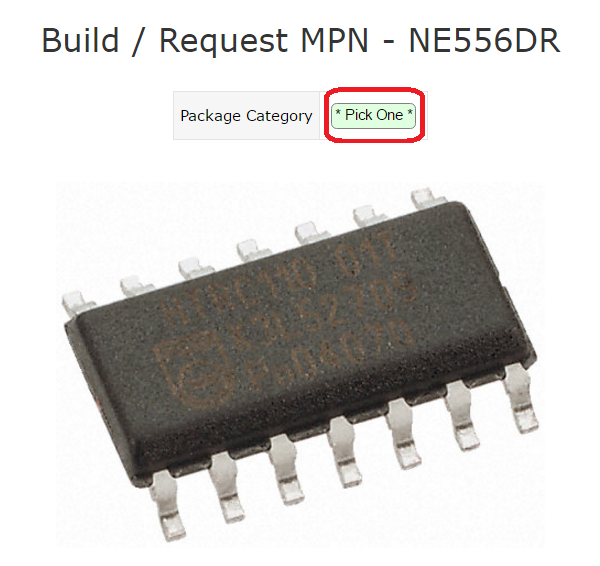
4. Choose the package category that the part falls under (clicking on ‘Pick One’ will show you all of the available package categories)
5. Click the ‘LAUNCH WIZARD’ button on the ‘BUILD’ graphic. (At this point you may be asked to login if you haven’t already)
6. You are now presented with the first step of three. Some of the information may already be filled in, but please check to make sure it is correct. Once you are happy with the properties entered, click ‘Next’.
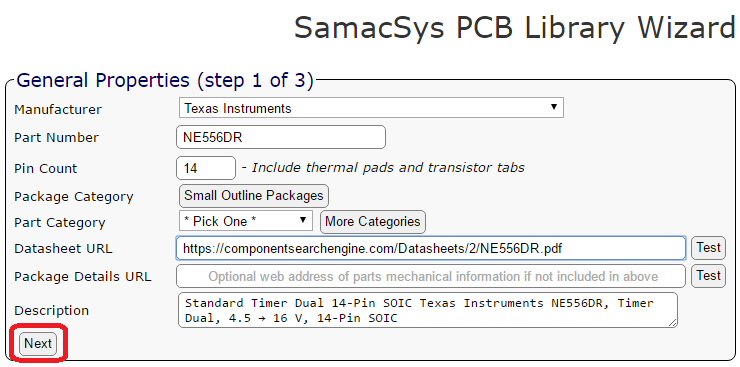
7. Before you go any further, click the test button next to the datasheet URL, this will serve two purposes. Firstly, you can check it is the correct datasheet for the part and secondly it will help you identify whether the package is already in our database.
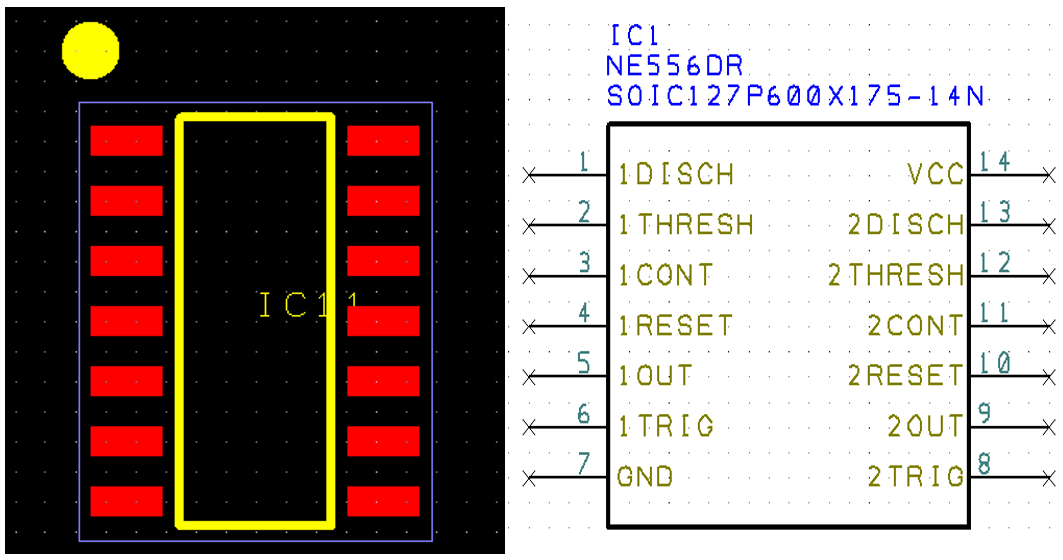
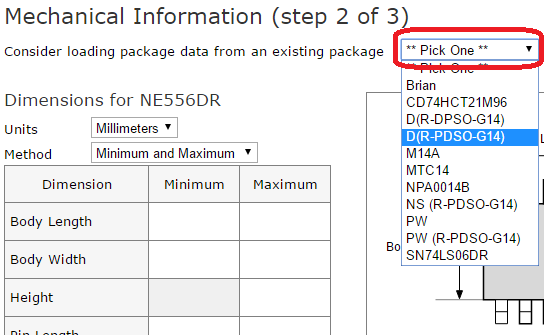
8. In this example, part number NE556DR refers to package D (R-PDSO-G14). Next to where it says “Consider loading package data from an existing package”, click on the ‘Pick One’ ‘button to see if the package is already in the database (this will save you having to enter all the dimensions manually). In this case, you can see that D (R-PDSO-G14) is already in our system. Click the package and the table automatically fills with the stored dimensions.
IMPORTANT: Whilst 100% accuracy is one of our fundamental aims, it is important to check the dimensions are correct using the datasheet. Packages are often updated or datasheets changed to reflect changes in the dimensions of a part.
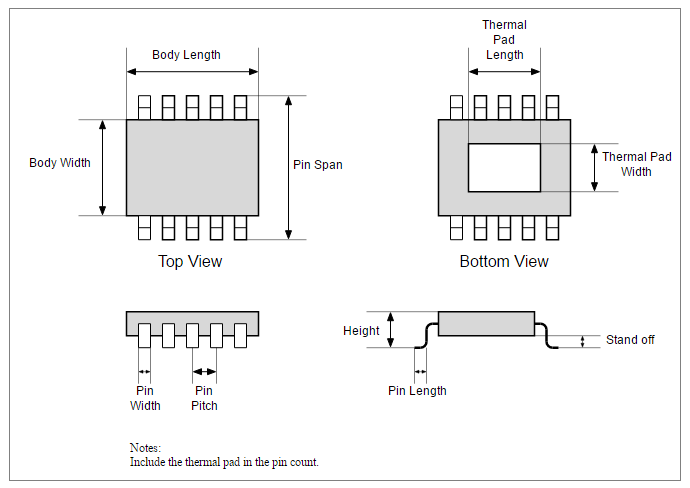
9. If the part is not already in our database, you will need to enter the dimensions manually. Find the appropriate part of the datasheet which contains a mechanical drawing and enter the dimensions in to the table. Follow the guidance on the web page to help you; each package category has its own pictorial guide to the entering of the dimensions of the part just to the right of the table.
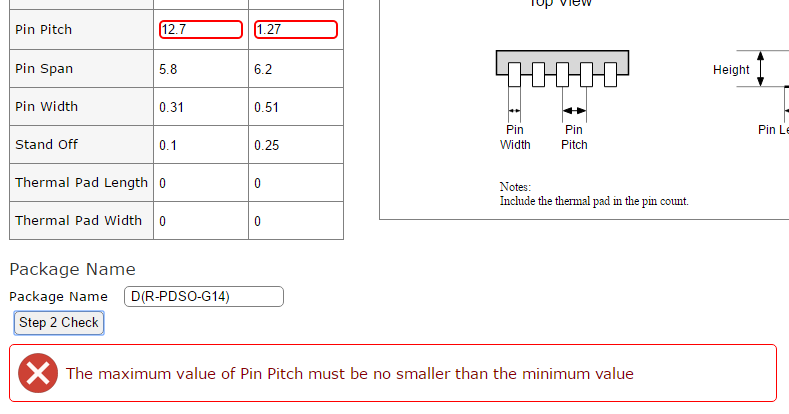
10. Once you are happy with the dimensions entered, click the ‘Step 2 Check’ button. If all of the dimensions pass our checks, you will presented with a message which will tell you that they have passed.

11. If for some reason they didn’t pass, you will receive a different message along with the cell(s) highlighted in the table where the errors are. Correct the error and again click the ‘Step 2 Check’ button.
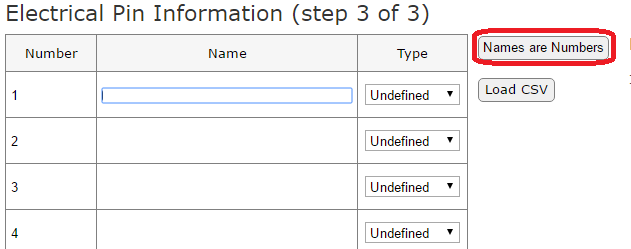
12. The final part of the process is the entering of the pin information. Find the appropriate part of the datasheet and enter the details in the table below. Some parts may just have numbered pins. In this instance you can simply click the ‘Names are Numbers’ button and the table will auto-fill with numbers in the ‘Name’ column. However, NEVER click on the ‘Names as Numbers’ button if a part has named pins. Once a part is released, it is available to the whole community.
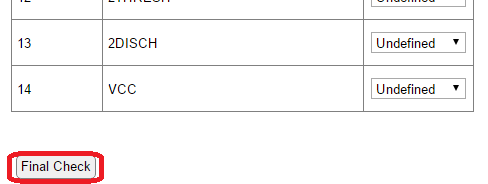
13. Once you are happy with the pin information, click ‘Final Check’. You should receive a message telling you that they have passed, if you get an error message, correct the information and try again.
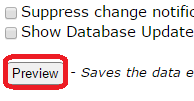
14. At this stage you have two options. Previewing or Releasing the part. We would strongly recommend previewing your part so that you can visually check the footprint of your part. By clicking on the ‘Preview’ button a footprint preview will be displayed just above the pin information table.
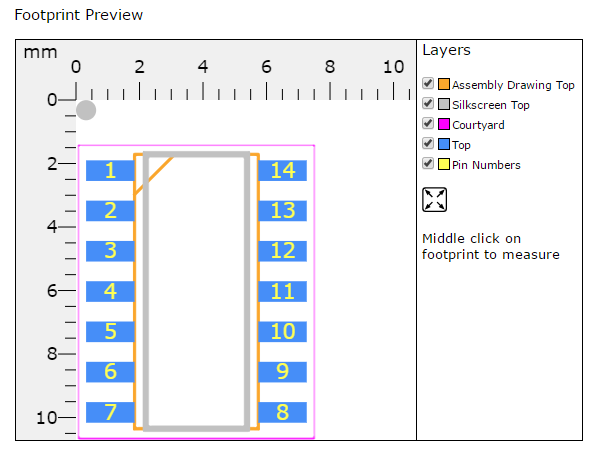
15. The footprint previewer allows you to zoom in and out (using the mouse wheel), move the footprint (by clicking the left mouse button) and measure parts of the footprint (using the middle mouse button). Once you are happy with your creation, go back down to where you clicked the ‘Preview’ button. You will need to click the ‘Final Check’ button again.
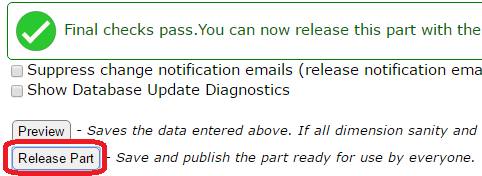
16. Click the ‘Release Part’ button. If you scroll to the top of the page you will notice a ‘Download Model’ button. If you have Library Loader installed clicking this button automatically downloads the part to your computer, automatically opens your ECAD tool and places the footprint/symbol on your cursor, ready to be inserted in to your design. Otherwise the files will be downloaded to your comupter to be imported in to your ECAD tool manually. Visit https://www.samacsys.com/library-loader/ to find out more and download Library Loader.